In the Garden Blog
Cincinnati's Garden Blog "In the Garden"
Straw Bale Gardening: A Unique, Easy Solution for Cincinnati Gardeners
We’re all familiar with container gardening and its many benefits. But have you heard about straw bale gardening? This innovative approach lets you grow plants in straw or hay bales, offering a flexible, eco-friendly option for gardeners with limited space, poor soil, or physical challenges. Ready to give it a try? Here’s everything you need to know about straw bale gardening.
Benefits of Straw Bale Gardening 
- Accessible for All: Raised off the ground, straw bales are perfect for gardeners who want to avoid bending over.
- Moisture Retention: Bales hold moisture well, which reduces the need for frequent watering and helps retain nutrients.
- Natural Pest Barrier: Straw bales protect plants from soil-borne diseases.
- Minimal Weeding: Little to no weeding is required.
- Sustainable Mulch: When finished, bales can be tilled into the soil as mulch or added to compost.
- Organic Option: For organic gardening, use organic straw bales!
Supplies Needed for Straw Bale Gardening
- Straw Bales: Choose tightly tied straw bales (hay is an option but may contain weed seeds). Wire or nylon ties are recommended for durability.
- Stakes: Use stakes at the ends of each bale to secure them and support plants as they grow.
- Soil Mix: Add compost, soil-less potting mix, or high-quality garden soil to the bales.
- Fertilizer: Straw bales need nitrogen for “cooking.” Organic options include bloodmeal and Espoma’s garden food, while traditional options include urea and granular garden fertilizers.
- Seeds and Plants: Straw bales can support various plants, including most vegetables and flowers.
Setting Up Your Straw Bale Garden
- Choose a Sunny Location: Pick a spot with at least 6 hours of sunlight daily and good drainage.
- Position Bales: Arrange bales in rows, squares, or stacked configurations. Place stakes at each end for added support.
- Orientation: If growing greens, position bales on their sides; otherwise, laying them flat works well for larger crops.
Preparing Your Bales
Naturally Seasoned Bales
Let your bales “weather” for about two months be in place for the best results. This natural decomposition process helps prepare the bales for planting.
Quick Preparation for Fresh Bales
If you’re planting soon, follow this 10-day conditioning process:
- Days 1-4: Soak the bales thoroughly daily to start the “cooking” process.
- Days 4-6: Apply about ½ cup of nitrogen-rich fertilizer (urea or bloodmeal) per bale daily, watering well.
- Days 7-9: Reduce to ¼ cup of fertilizer daily and moisten the bales.
- Day 10: Add 1 cup of balanced fertilizer (5-10-10 or similar), water well, and moisten the bales.
After day 12-14, your bales should be ready for planting.
Planting in Straw Bales
- Top Layer: Add a 1-3 inch layer of compost or garden soil mix to each bale.
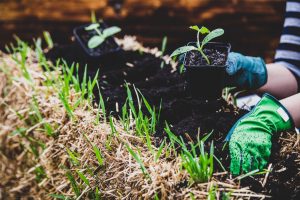
- Planting Transplants: Use a hand trowel to create a pocket in the bale, plant your transplants, and fill in with compost.
- Spacing: Space plants as you would in the ground—about two tomatoes or 2-3 peppers per bale, for example.
- Water and Fertilize: Water and fertilize regularly, adjusting according to the plant’s needs. To reduce moisture loss, consider covering bales with landscape fabric and using a soaker hose for easy watering.
What Can You Grow?
Straw bales support a wide range of plants! Some great choices include tomatoes, peppers, eggplant, greens, onions, cucumbers, squash, melons, herbs, and beans. (Root crops and taller plants like corn may be more challenging.)
Adding Color and Excitement
Consider adding a few annuals or perennials to your straw bales for a pop of color. Vining plants can cover the corners and add visual interest. Try a full display of flowers for a unique garden feature that’s sure to be a conversation starter!
Troubleshooting Common Issues
- Ants: Use natural controls or baits that are safe for edibles.
- Mice or Voles: Baited snap traps can help manage these pests.
- Weeds and Mushrooms: Hand-pull weeds; if mushrooms appear, knock them over. They won’t harm your plants.
- Tightly Baled Bales: If the bales are very compact, a powered tool may be needed to create planting holes.
Extend Your Growing Season with a Straw Bale Cold Frame
Create a simple cold frame by arranging six bales in a rectangular shape and covering them with an old window or plastic. This setup is perfect for growing greens early or extending the growing season into early winter.
Cincinnati Gardening Made Simple!
Do you have a question about straw bale gardening? Ask our experts!
#StrawBaleGardening #CincinnatiGardening #ContainerGardening #SustainableGardening #EasyGardenTips #FallPlanting #OrganicGardening